XBox One Indie Development
Monday 4 January 2016
Serializing and Saving/Loading Data in Unity3D for UWP 10
This is a great place to start, but, if like me, you like to serialize your game data and write it to a file, then you will probably come across the issues I had.
My issues were namely around the restrictions on the namespaces that can be used in the UWP 10 build. To my knowledge, we can’t use binary serializers for UWP and I think the use of DataContractSerializerDataContractSerializers are recommended (I like using them anyway)
So, I decided, after having all sorts of issues porting an existing project to start from the beginning and create a game project for UWP 10 from the get go.
I created a class called Dude, this was going to store my player data, position, name score, etc.. I made this class a DataContract and the properties I wanted to save DataMemebers, all good so far…
I then created a simple Serializer class that I can use to serialize any class that is a DataContract.
As you can see it’s pretty simple.
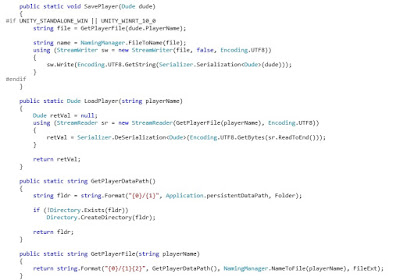
Within my Dude class I created simple load and save methods that would use the serializer
Again, pretty simple stuff right?
So, running this as a regular PC game all works fine, it builds, my game runs, I can save and re load player data perfectly.
Switch to a Universal 10 build and it all went a bit wrong lol
In the serializer class I got one compile error reported by the Unity editor
Assets\Scripts\Utilities\Serializer.cs(40,23): error CS1061: 'MemoryStream' does not contain a definition for 'Close' and no extension method 'Close' accepting a first argument of type 'MemoryStream' could be found (are you missing a using directive or an assembly reference?)
It seemed that under UWP 10, the Close method on the MemoryStream is no longer there, this was simply fixed by wrapping the Close method in a #if for the appropriate build type. It may well be better to just host the MemoryStream in a using (){} as I am not sure if doing it like this could result in memory issues on UWP 10 due to the stream not getting closed.
Now, my dude class had more issues… All the issues in my save and load methods were due to the System.IO.Stream and System.Text.Encoding, this took me a little longer to sort out, but after some Google/Bing searches I discovered that Unity3D provides a UnityEngine.Windows namespace that holds a new Dictionary and File objects that can be used for saving the data, once I found that out, fixing the code was as simple as it was in the serializer class.
I hope this will help if you come across these issues, as I pulled out a fair bit of my hair solving this, and I have to tell you, I have little hair to start with :P
Tuesday 24 February 2015
Unity3D Shaders–Multi Pass Surface Shader
<< Previous Next >>
In this post we are going to be looking at making a multi pass shader, and I can hear you say
“What exactly is a multi pass shader?”
So, up until now we have been looking at single pass shaders, so the vertices are passed into the render pipeline, and the shader applies one vertex (we don’t have to write this with a surface shader) and one surface shader to the vertex data passed.
With a multi pass shader, the shader resends the vertex data to the render pipeline and applies the next pass of functions to the vertex data.
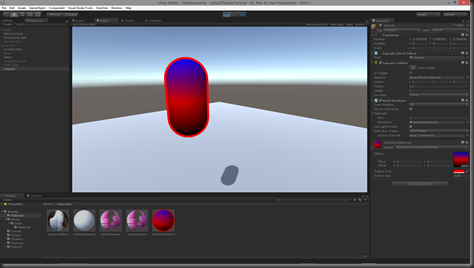
In the image above, in the first pass we call the same methods we did for our diffuse shader, so a simple lighting model and a simple surface shader, in the second pass we execute the code to draw the toon like outline you can see.
Creating multiple passes in a surface shader is as simple as adding another CGPROGRAM section, the order you create the passes is the order of execution. There is a little more to it for vertex & fragment shaders, but we will cover those in another post.
Let’s create another shader file in the Unity editor, just as we have before, also create a material for it and assign our new shader to it. Call the shader SSOutline, the material SSOutlineMaterial. Apply the material to your model as we have over the past few posts.
For simplicity I am going to create a Capsule and apply my material to that.
First thing we will do it take the code from our diffuse shader we did earlier and put it in our new SSOutline shader, it should look something like this now
Shader "Randomchaos/Tutorial/SSOutline"
{
	Properties
	{
		_MainTex ("Diffuse", 2D) = "white" {}

	}
	SubShader
	{
		Tags { "RenderType"="Opaque"}
		LOD 200


		// Geom pass
        CGPROGRAM
        #pragma surface surf SimpleDiffuse

        sampler2D _MainTex;

        half4 LightingSimpleDiffuse (inout SurfaceOutput s, half3 lightDir, half atten)
        {
			half4 c;

			half NdotL = saturate(dot(s.Normal, lightDir));

			c.rgb = s.Albedo * _LightColor0.rgb * NdotL;
			c.a = s.Alpha;
			return c;
        }

        struct Input
        {
            float2 uv_MainTex;
            float2 uv_Bump;
        };

        void surf (Input IN, inout SurfaceOutput o)
        {
            half4 c = tex2D (_MainTex, IN.uv_MainTex);
			o.Albedo = c.rgb;
			o.Alpha = c.a;
        }
        ENDCG
	}
    FallBack "Diffuse"
}
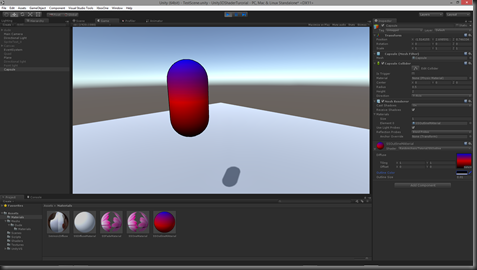
Pretty much the same thing we had before, I can now pass this shader a texture and it will be applied to my mesh like this.
Now, we want to be able to render an outline around this mesh, so we will need to be able to give it at least two values to do this, the colour of the line we want and the thickness. All we need to do, to enable the shader to take these two new parameters is to add them to the properties at the top of the shader.
I am going to have _OutlineColor to denote the colour of the outline (forgive me mixed spelling of colour, one is the English spelling, colour, the other is the American, color, the later is used in code) and I am going to have _OutlineSize to denote how thick I want the line to be.
	Properties
	{
		_MainTex ("Diffuse", 2D) = "white" {}

		_OutlineColor ("Outline Color",Color) = (0,0,0,1)
        _OutlineSize ("Outline Size", float) = .05
	}
I have given them the default values of black and .05 respectively. At this point we can still use and run our shader like this, but no matter what we do with those parameters it is not going to change what is rendered, this is where our second pass it used.
The second pass is effectively going to render the vertices again, only this time we are going to manipulate the vertex data in the vertex shader so that it draws the mesh slightly larger than the original mesh rendered, using the _OutlineSize parameter.
Then in the second pass surface shader, we are going to render the mesh using the _OutlineColor provided and have a lighting calculation that just render’s the line with no lighting calculations applied to it.
This is what this pass will look like, but I will go over the components and describe what is going on in each section.
		// Outline pass

        CGPROGRAM
        #pragma surface surf LineLit vertex:vert

        float4 _OutlineColor;
        float _OutlineSize;

        void vert (inout appdata_full v)
        {
            v.vertex.xyz += v.normal * _OutlineSize;
        }

        half4 LightingLineLit (inout SurfaceOutput s, half3 lightDir, half3 viewDir)
        {
			return float4(s.Albedo,s.Alpha);
        }

        struct Input
        {
            float2 uv_MainTex;
            float2 uv_Bump;
        };

        void surf (Input IN, inout SurfaceOutput o)
        {
            o.Albedo = _OutlineColor;
            o.Alpha = _OutlineColor.a;
        }
        ENDCG
First thing we do is let the render pipeline know we are starting a new CGPROGRAM, like before we set up the shaders to be used with a #pragma, but there are some differences here, what are they?
#pragma surface surf LineLit vertex:vert
As before, we are telling it our surface shader is called surf and that we will be using our own lighting calculation called LineLit, but we are also telling it that we are also using our own vertex shader called vert, rather than use the one Unity supplies for us.
        void vert (inout appdata_full v)
        {
            v.vertex.xyz += v.normal * _OutlineSize;
        }
Again, remember back to the first post we did when creating the data stored in the vertex?
// Set up position data.
positions.Add(new Vector3(-.5f, .5f, 0));           // Top left corner
positions.Add(new Vector3(-.5f, -.5f, 0));          // Bottom left corner
positions.Add(new Vector3(.5f, -.5f, 0));           // Bottom right corner
positions.Add(new Vector3(.5f, .5f, 0));            // Top right corner
This position data is stored in the v.vertex elements, remember this is a vertex shader, so each vertex on the mesh is set up ready for the screen in here and this data is no interpolated like in the pixel and surface shaders, it is the raw data in the vertex as it was created.
        // Create our own normals
        normals.Add(Vector3.back);
        normals.Add(Vector3.back);
        normals.Add(Vector3.back);
        normals.Add(Vector3.back);
Again, this normal data is stored in the v.normal for this vertex, and as with the position, this is the raw un interpolated data that is used to render the triangles on the screen.
In this vertex shader v is an instance of a predefined Unity vertex structure that will get populated by our mesh’s data. In this case it is using appdata_full, there are a fwe pre defined structures, but appdata_full has all the vertex data elements you are most likely to need. If you would like more information on these structures check out this Unity document.
So, in the vertex shader we are saying, move the position of this vertex in the direction of the normal (remember a range of 0-1 for each axis) by a multiple of _OutlineSize. This will result in the mesh being drawn again, but scaled by _OutlineSize.
The surface shader can then just set the Albedo and Alpha to the colour we have chosen to render the line in and the lighting calculation just returns the colour without any lighting calculations on it.
BUT, if we run this shader now, all we will get is a slightly bigger version of our mesh rendered over the first pass like this
How do we get this to be an outline of our mesh as opposed to just blocking it out?
Well, when the render pipeline draws triangles, it has a culling calculation so that any triangles that are facing away from it are removed from the render pipeline and so don’t need to be drawn. In the case of Unity this is what’s known as a backside cull, that is to say, any triangles facing away are removed from the pipeline, but we want front a side cull, how do we tell the shader, that for this pass we want to only see the back of the triangles?
Just before we start the CGPROGRAMM block for the second pass we can change some of the pipeline settings, so in the lines between my comment and the CGPROGRAM block we can set the cull mode to forward like this
		// Outline pass
        Cull Front

        CGPROGRAM
        #pragma surface surf LineLit vertex:vert

        float4 _OutlineColor;
        float _OutlineSize;
Cull has three settings, Back, Front and None. Back is the default, and None means it will render both sides of your triangles, so if you had something like a flag or a window and wanted to see both sides of the thin mesh you would use None.
Our render now looks like this
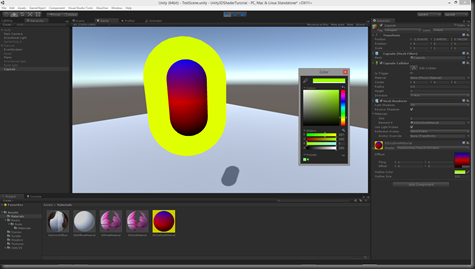
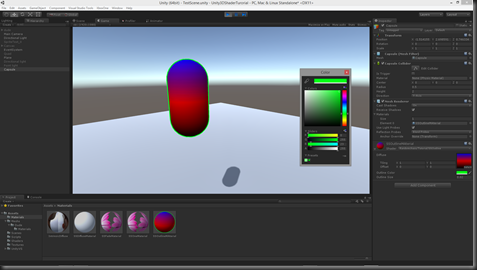
We can now adjust the thickness and colour of the outline to suit the look we want.
Or on a more complex mesh like this
The whole SSOutline shader looks like this
Shader "Randomchaos/Tutorial/SSOutline"
{
	Properties
	{
		_MainTex ("Diffuse", 2D) = "white" {}

		_OutlineColor ("Outline Color",Color) = (0,0,0,1)
        _OutlineSize ("Outline Size", float) = .05
	}

	SubShader
	{
		Tags { "RenderType"="Opaque"}
		LOD 200


		// Geom pass
        CGPROGRAM
        #pragma surface surf SimpleDiffuse

        sampler2D _MainTex;

        half4 LightingSimpleDiffuse (inout SurfaceOutput s, half3 lightDir, half atten)
        {
			half4 c;

			half NdotL = saturate(dot(s.Normal, lightDir));

			c.rgb = s.Albedo * _LightColor0.rgb * NdotL;
			c.a = s.Alpha;
			return c;
        }

        struct Input
        {
            float2 uv_MainTex;
            float2 uv_Bump;
        };

        void surf (Input IN, inout SurfaceOutput o)
        {
            half4 c = tex2D (_MainTex, IN.uv_MainTex);
			o.Albedo = c.rgb;
			o.Alpha = c.a;
        }
        ENDCG

		// Outline pass
        Cull Front

        CGPROGRAM
        #pragma surface surf LineLit vertex:vert

        float4 _OutlineColor;
        float _OutlineSize;

        void vert (inout appdata_full v)
        {
            v.vertex.xyz += v.normal * _OutlineSize;
        }

        half4 LightingLineLit (inout SurfaceOutput s, half3 lightDir, half3 viewDir)
        {
			return float4(s.Albedo,s.Alpha);
        }

        struct Input
        {
            float2 uv_MainTex;
            float2 uv_Bump;
        };

        void surf (Input IN, inout SurfaceOutput o)
        {
            o.Albedo = _OutlineColor;
            o.Alpha = _OutlineColor.a;
        }
        ENDCG
	}
	FallBack "Diffuse"
}
As ever, hope you have found this post useful and if you have any questions or critique, please post them in the comments section :)
<< Previous Next >>
Thursday 19 February 2015
Unity3D Shaders–Surface Shaders : Lighting Models
Now, lighting models are just the ability to calculate how the light(s) bounces off the surface of the geometry. It does not the ability to do your own shadow mapping.
So, as I said in an earlier post, we declare the lighting model to be used in the shader, in the #pragma section, in all our other surface shaders we have used the Lambert lighting model, we can also use BlinnPhong.
#pragma surface surf Lambert
Lighting models can be written for both forward and deferred rendering pipelines, you can alter the render mode in Unity, by default it uses forward rendering and I think deferred is a pro feature.
Forward rendering is when each light is calculated against each mesh, so the more lights you have the slower things are going to get. Normally a forward render will not have more than 3 lights in it as after that light calculations start to lag.
Deferred rendering is done once ALL the mesh’s are rendered and they are applied to the whole scene in one go, so with deferred you can have lots and lots of lights will very little slow down.
As Unity uses forward render and deferred it a pro feature I am going to focus on forward surface shader lighting models.
Lets create our own lighting model. To do this we need to give it a name. For this first lighting model we will go with a simple diffuse, so all we want to do in the lighting model is find the angle of the light source bouncing off the surface. As it is a surface shader this done on each pixel of each triangle on the mesh being rendered.
Add a shader to your Shaders asset folder and name is SSDiffuse, create a new material called SSDiffuseMaterial, associate the shdaer with the material as we have done in the previous posts.
It should looks something like this
Shader "Randomchaos/Tutorial/SSDiffuse"
{
 Properties
 {
  _MainTex ("Base (RGB)", 2D) = "white" {}
 }

 SubShader
 {
  Tags { "RenderType"="Opaque" }
  LOD 200

  CGPROGRAM
  #pragma surface surf Lambert

  sampler2D _MainTex;
  float _Ramp  =1;

  struct Input
  {
   float2 uv_MainTex;
  };


  void surf (Input IN, inout SurfaceOutput o)
  {
   half4 c = tex2D (_MainTex, IN.uv_MainTex);
   o.Albedo = c.rgb;
   o.Alpha = c.a;
  }
  ENDCG
 }
 FallBack "Diffuse"
}
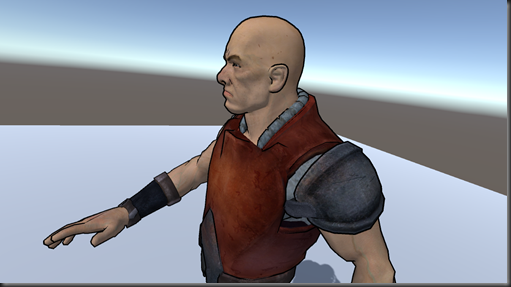
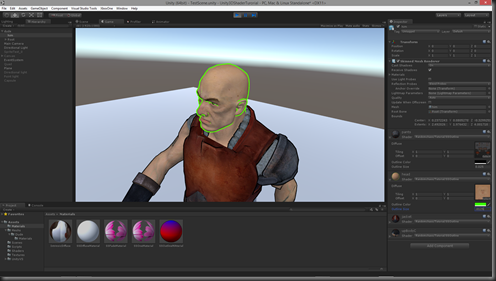
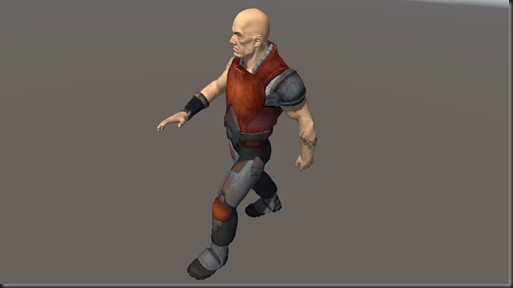
Put a mesh into your scene and apply this shader to it, I have used Dude from the old MS XNA Demos, and with the above shader, he looks like this
Lets set up our own lighting model in this shader. First thing we need to do is tell the shader to use our new lighting model, we well call it SimpleDiffuse and replace Lambert with our new model in the #pragma like this
#pragma surface surf SimpleDiffuse
Now we need to provide a function that gets called to do our lighting calcs, in forward rendering, there are two function signatures we can use, this first is for lighting models that we don’t need to know the cameras view direction, like a diffuse shader, the other is for shaders that do, so things like specular calculations (thanks Unity docs).
half4 Lighting<Name> (SurfaceOutput s, half3 lightDir, half atten);
half4 Lighting<Name> (SurfaceOutput s, half3 lightDir, half3 viewDir, half atten);
As we can see, the method name needs to start with Lighting followed by the name of our model, in our case SimpleDiffuse, so our function will look like this
  half4 LightingSimpleDiffuse (SurfaceOutput s, half3 lightDir, half atten)
  {
           return 1;
        }
If se save our shader now and check out our rendered mesh, it will look like this
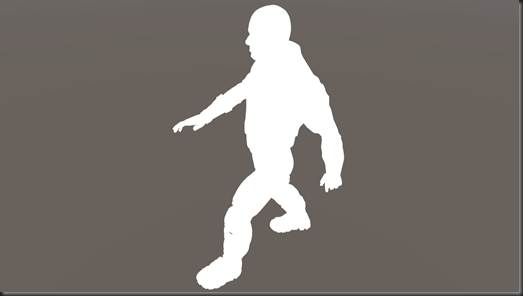
The whole thing is white! That’s because, we are returning the value of 1, but the shader is expecting a half4 (half4 is a small float3 effectively), why is there no error thrown?
It’s because when we set a float<n> or half<n> or any other vector to a single value like this, all the elements of the vector are set to that value, so, in this case 1,1,1,1 is returned.
So in our lighting model we are saying that the surface is being lit at every angle with the colour white. If we change our lighting calculation to look like this
  half4 LightingSimpleDiffuse (SurfaceOutput s, half3 lightDir, half atten)
  {
           return _LightColor0;
        }
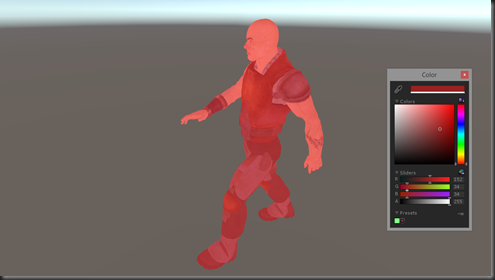
_LightColor0 is pre loaded by Unity for us, this value is set each time the light calculation is done for another light, so this will also handle multiple lights in a forward rendered scene.
We can then play with the lights colour in the scene or game window and we can see that the texture is still being rendered, but when we set the colour to white in the lighting model, that’s all we see, so the surf shader is being called then the lighting model is being applied to it.
OK, lets start to make this shader start to look like a diffuse effect. We can see in our function signature, we are getting passed a structure called SurfaceOutput. This structure gives us a few elements we can use
 struct SurfaceOutput
 {
     half3 Albedo;
     half3 Normal;
     half3 Emission;
     half Specular;
     half Gloss;
     half Alpha;
 };
At the moment in our surface shader we are only setting the Albedoo and the Alpha, so lets use these in conjunction with the light colour like this
  half4 LightingSimpleDiffuse (SurfaceOutput s, half3 lightDir, half atten)
  {
   half4 c;

   c.rgb = s.Albedo * _LightColor0.rgb;
            c.a = s.Alpha;

   return c;
        }
So we set up a half4 variable called ‘c’, this is going to be the value we return, we then set the rgb (Red, Green, Blue) elements of the return variable with the given Albedo multiplied by the light colour, why multiplied? Because if we added it and the light was black, we would just get the Albedo color, which would be wrong, if there is no light, no colours should be bouncing off the surface.
We then set the Alpha as it’s passed in, and return what we have calculated.
The effect of this shader now looks like this
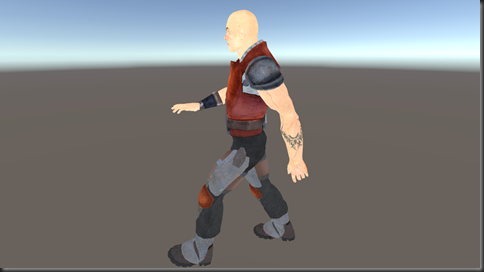
So a little better. By the way, if you change your light to black, there is still some light applied to the mesh, this is the ambient light that is applied to the model. We can switch this off, by default, the ambient colour (in Unity 5) is set to that of the skybox, open the Lighting Window
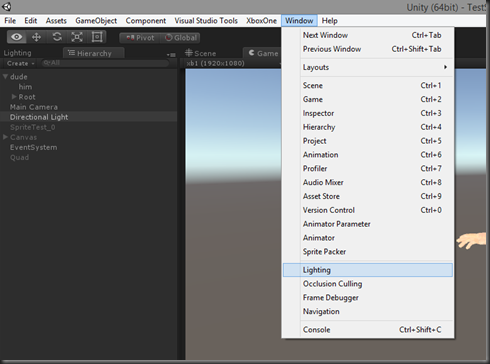
You can now either alter the Ambient Source or set it’s intensity to 0
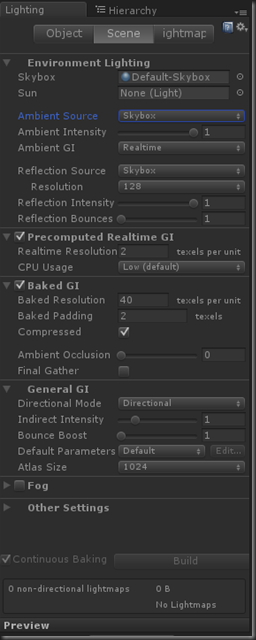
Now, our shader is not taking into account the angle of the surface with that of the light, so we get an un natural flat looking render. How do we calculate the angle between the surface and the light, and how do we then modify the colour to reflect (forgive the pun) that?
Well, there is an awesome method we can use called dot. dot(float4, float4) takes two vectors and returns the dot product, of the two vectors. In other words it will return a value between –1 and 1, where 1 would be that the light is directly over the surface, so 90 degrees over it and –1 would effectively be at 90 degrees again but on the other side of the surface, so behind it.
So, how do we do that, how do we know the direction the surface is facing, and the direction of the light hitting that surface?
Well, the light direction we can get easy as Unity hands it to us in our function as a parameter, so that’s that bit solved, but what about the direction the surface is facing….. Remember back in the first post, we covered what a vertex is and the data that is in it?
One of the data elements was called the normal that describes the direction the vertex is facing, so each triangle is made of 3 vertices, each vertex has a normal describing its direction of facing, so, just like with the texture coordinates (described in the second post) these too are interpolated, and if you look at the SurfaceOutput structure, we get given the current pixels “Normal” :) How cool is that!! (I know, I’m a geek)
So, now we can find the angle the light is hitting this pixel of the surface like this
dot(s.Normal, lightDir)
Now, this will return a value, as I said above, in the range of –1 and 1, but I don’t care if it’s behind the surface, I just want to know how much light to reflect, so I am going to use a function called saturate that will clamp the value between 0 and 1 and store it in a variable like this
half NdotL = saturate(dot(s.Normal, lightDir));
We can now use this value to multiply our output colour and our lighting calculation now looks like this
  half4 LightingSimpleDiffuse (SurfaceOutput s, half3 lightDir, half atten)
  {
   half4 c;

   half NdotL = saturate(dot(s.Normal, lightDir));

   c.rgb = s.Albedo * _LightColor0.rgb * NdotL;
            c.a = s.Alpha;

   return c;
        }
Which then means we get a decent diffuse render like this
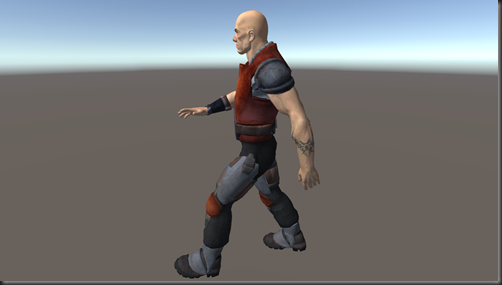
So, lets have a look at this with two lights rendered and a floor…
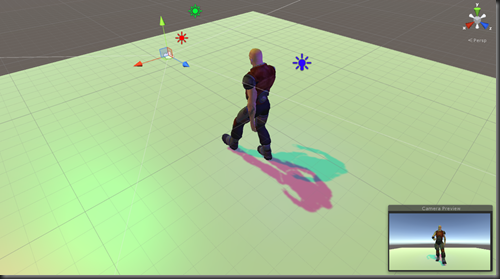
As you can see the surface shader is handling all the lighting passes for us, we don’t have to worry about how many lights. In this scene are two directional lights, one green, one red and a blue point light at the back of the mesh.
I know what you are thinking,
“Why on earth have we just created this shader when I can just use the standard Diffuse shader that ships with Unity?!!!”
Well, I wanted to show you, with the simplest shader I could how we can create our own lighting calculations, and to give you an idea of all the bits Unity is doing for us with a Surface Shader.
I was going to cover more lighting model types and look at some other surface shaders, but I am sure with the small bit of information I have tried to arm you with in these first few posts you can take a look at the examples in the Unity Docs and start experimenting with them your self. You can find the surface shader examples here, and the lighting model examples here.
In my next post, I am going to show how you can combine a surface shader with a vertex shader, using the vertex shader to alter the geometry and also look at a multiple pass surface shader.
As ever, your comments and critique are always welcome, feel free to post :)
<< Previous Next >>
Monday 16 February 2015
Unity3D Shaders–Surface Shaders Continued
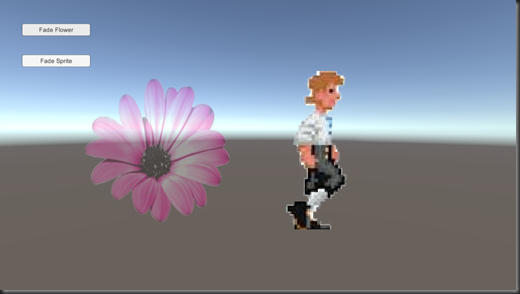
SSFadeShader
Shader "Randomchaos/Tutorial/SSFadeShader"
{
 Properties
 {
  _MainTex ("Base (RGB)", 2D) = "white" {}
  _FadeOut("Fade out value", Range(0,1)) = 1
 }

 SubShader
 {
  Tags { "Queue"="Transparent" "RenderType"="Transparent" }
  LOD 200

  CGPROGRAM

  #pragma surface surf Lambert alpha

  sampler2D _MainTex;
  float _FadeOut;

  struct Input
  {
   float2 uv_MainTex;
  };


  void surf (Input IN, inout SurfaceOutput o)
  {
   half4 c = tex2D (_MainTex, IN.uv_MainTex);
   o.Albedo = c.rgb;
   o.Alpha = c.a * _FadeOut;
  }
  ENDCG
 }
 Fallback "Diffuse"
}
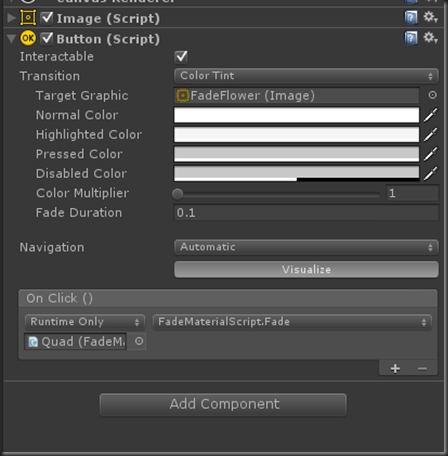
FadeMaterialScript.cs
using UnityEngine;
using System.Collections;

public class FadeMaterialScript : MonoBehaviour
{
    public float FadeSpeed = .01f;

    float currentFade;
    bool fade;
    float fadeValue = 1;

    Renderer renderer;

 // Use this for initialization
 void Start ()
    {
        currentFade = FadeSpeed ;

        renderer = GetComponent<Renderer>();
 }

 // Update is called once per frame
 void Update ()
    {
        if (fade)
        {
            fadeValue += currentFade;

            fadeValue = Mathf.Clamp01(fadeValue);

            if (fadeValue == 0 || fadeValue == 1)
                fade = false;

            renderer.material.SetFloat("_FadeOut", fadeValue);
        }
 }

    public void Fade()
    {
        currentFade *= -1;
        fade = true;
    }
}
renderer.material.SetFloat("_FadeOut", fadeValue);
Sunday 15 February 2015
Unity3D Shaders
So, I hope, prior to reading this tutorial you have read my previous post laying down some fundamental ideas we sort of need before we start to look at creating shaders. If you haven't, then please, hop back and have a read of it here, or simply click the << Previous links at the top and bottom of this post.
Ill repeat my caveat here, I am no shader or Unity expert, these posts are based on what I have found through my own exploration of shaders in Unity, but I hope what you find here gives you some pointers and ideas for your own shaders and adventures creating shaders :)
Unity gives us a few shader types that we can write, surface shaders, as well as vertex and fragment shaders.
If you are coming from XNA/DX vertex shaders are the same as DX9 vertex shaders and fragment shaders are the analogue of pixel shaders. In XNA there is no analogue with surface shaders.
If you have no experience of shaders at all, then I had best describe to you the difference of each of these shaders.
Vertex Shader
A vertex shader is a function that runs on the GPU, it takes a single vertex (as described in the last post) and places it on the screen, that is to say if we have a vertex position of 0,0,0 it will be drawn in the centre of out mesh, if the mesh then has a position of 0,0,10 the vertex will be drawn at that position in the game world. This function returns this position data, as well as other data back to the graphics pipeline and this data is then passed, after some manipulation, to the pixel shader, or in the case of Unity, it may be passed to a surface shader, depending how we have written it.
A vertex shaders calculations are done on each vertex, so in the case of our quad from earlier, this would be executed 6 times, once for each point of the two triangles the quad is made up of.
Pixel Shader
The pixel shader is given each and every pixel that lies with in each of the triangles in the rendered mesh and returns a colour. As you can imagine, depending on how much of the screen your mesh takes up, this could be called once for every pixel on your screen!! Needless to say pixel shaders are more expensive that vertex shaders.
Surface Shaders
These are a strange halfway house between the vertex and pixel shader. You do not need to create a vertex shader with a surface shader as Unity will use it’s default one, but you can if you need one, we will cover that later. It comes with a set of predefined elements that will automatically use the Unity lighting model. You can write you own lighting calculations too which is quite cool, but, like anything else, you don’t get something for nothing, they will have an overhead, but if I am honest, I have not had too many issues with them.
I think the first shader we should look at is the Unity Surface shader. These shaders are a great way to start as they do a lot of work for you, you don’t have to worry about all the lighting calculations, if forward rendering or deferred rendering is being used, all we have to do is worry about the colour out put.
Create our first Surface Shader
From within your Assets folder, create a few new folders called Shaders, Materials and Scripts.
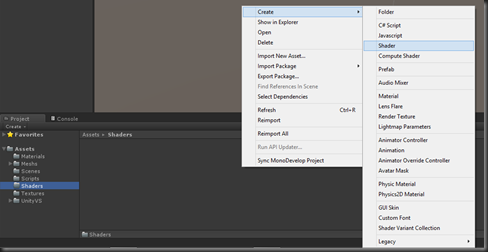
In the Shaders folder, we will create out first surface shader, right click in or on the shaders folder, select Create, then Shader
Call this first shader SSOne. Lets take a look at what we get just by creating this shader file.
Shader "Custom/SSOne"
{
	Properties
	{
		_MainTex ("Base (RGB)", 2D) = "white" {}
	}

	SubShader
	{
		Tags { "RenderType"="Opaque" }
		LOD 200

		CGPROGRAM
		#pragma surface surf Lambert

		sampler2D _MainTex;

		struct Input
		{
			float2 uv_MainTex;
		};

		void surf (Input IN, inout SurfaceOutput o)
		{
			half4 c = tex2D (_MainTex, IN.uv_MainTex);
			o.Albedo = c.rgb;
			o.Alpha = c.a;
		}
		ENDCG
	}
	FallBack "Diffuse"
}
First things first, I removed the silly java style brackets, the ones that have the opening ‘{‘ bracket on the same line as the condition or definition, they should always be on the next line in my opinion ;)
So, we have a few things going on in this file already, we will look at them in turn moving down through the file.
Shader Name
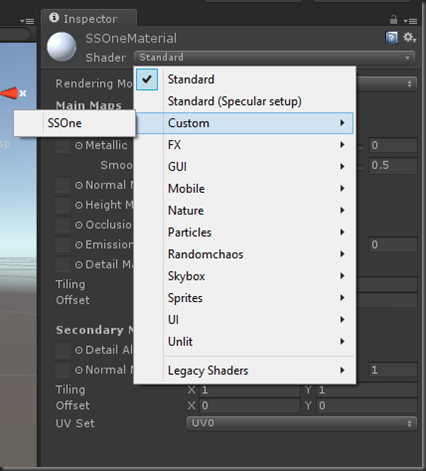
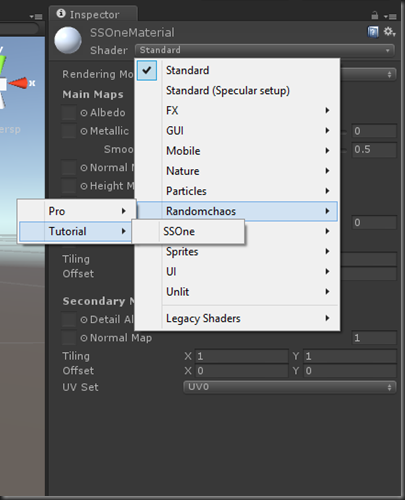
At the top we have the Shader name in quotes, with this field we are also able to change how unity displays it in the list of shaders when we go to add it to a material.
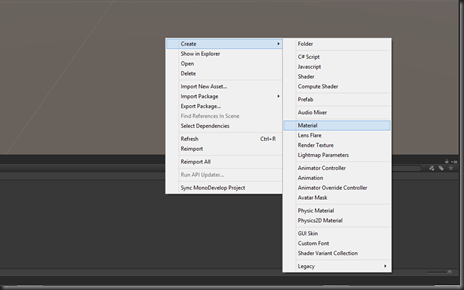
Lets create a material to add this new shader to, in the Material folder, right click on or in it, select create then Material like this
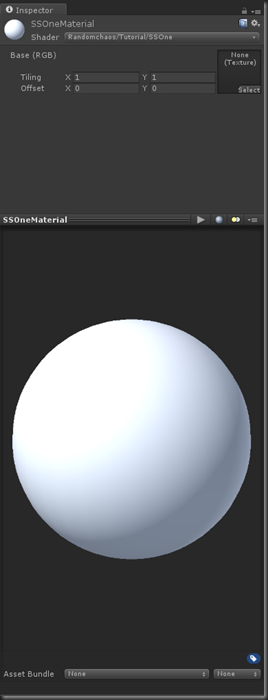
Name this material SSOneMaterial, we can now add our new shader to it. Click the shader combo box, our shader is in Custom select that option and you will be able to see the shader in the list
Lets change the name and location of our shader, so change the header from
Shader "Custom/SSOne"
{
To
Shader "Randomchaos/Tutorial/SSOne"
{
If we go to add it now, it looks like this
Shader Properties
The properties section defines any variables we want to pass to the shader. At the moment, in the file created by unity, we only have one variable and it’s a texture to be used in this shader. There are a few different types of parameters that can be passed. Before we look at the types, lest look at the definition of the parameter we currently have.
_MainTex ("Base (RGB)", 2D) = "white" {}I guess the “signature” of these parameters is as follows
<param name> (“UI Description”, type) = <default value>
So, for our current parameter it has the name _MainTex, the description that will be shown in the UI is “Base (RGB)” and the type is a 2D texture, it’s default value is white, lets look at that in the UI.
We have a few options when it comes to parameters
Property Type | Description |
| Range(min,max) | Defines a float property, represented as a slider from min to max in the inspector. |
| Color | Defines a color property. (r,g,b,a) |
| 2D | Defines a 2D texture property. |
| 3D | Defines a 3D texture property. |
| Rectangle | Defines a rectangle (non power of 2) texture property. |
| Cubemap | Defines a cubemap texture property. |
| Float | Defines a float property. |
| Vector | Defines a four-component vector property. |
SubShader
The next bit of this file is where all the work is done.
The first thing we see is the Tag, we have a few elements to this part of the Unity Shader file, we can control quite a few things from here
At the moment it looks like this
Tags { "RenderType"="Opaque" }So, as you can see we are using one tag type in there called RenderType and it’s set to Opaque, so no transparency.
So what tag types are there?
Tag Type | Description |
Queue | With this tag type you can set what order your objects are drawn in. |
| RenderType | We can use this to put our shader into different render groups that help Unity render them in the right way. |
| ForceNoShadowCasting | If you use this and set it to true then your object will not cast any shadows, this is great if you have a transparent object. |
| IgnoreProjector | If used and set to true, this will ignore Projectors, now until I decided to write this tutorial I have never heard of these, but they do look useful :D |
Lets look at the available values that can be used for Queue and RenderType
*Descriptions ripped from the Unity docs ;)
We wont use the queue tag, but it’s nice to know how we can use them, you never know, later on, a few posts down the line we might use it.
Queue Value | Description |
| Background | This render queue is rendered before any others. It is used for skyboxes and the like. |
| Geometry (default) | This is used for most objects. Opaque geometry uses this queue. |
| AlphaTest | !lpha tested geometry uses this queue. It’s a separate queue from Geometry one since it’s more efficient to render alpha-tested objects after all solid ones are drawn. |
| Transparent | This render queue is rendered after Geometry and AlphaTest, in back-to-front order. Anything alpha-blended (i.e. shaders that don’t write to depth buffer) should go here (glass, particle effects). |
| Overlay | This render queue is meant for overlay effects. Anything rendered last should go here (e.g. lens flares). |
Again, at the moment we are not too concerned with these tags, but it’s good to be aware of them.
RenderType Value | Description |
| Opaque | Most of the shaders (Normal, Self Illuminated, Reflective, terrain shaders). |
| Transparent | Most semitransparent shaders (Transparent, Particle, Font, terrain additive pass shaders). |
| TransparentCutout | Masked transparency shaders (Transparent Cutout, two pass vegetation shaders) |
| Background | Skybox shaders |
| Overlay | GUITexture, Halo, Flare shaders |
| TreeOpaque | Terrain engine tree bark |
| TreeTransparentCutout | Terrain engine tree leaves. |
| TreeBillboard | Terrain engine billboarded trees |
| Grass | Terrain engine grass. |
| GrassBillboard | Terrain engine billboarded grass. |
LOD
Our shader currently has the value 200, this is used when you want to restrict your shaders, so when deploying to certain platforms you may want to disable shaders > LOD 200. You can check out the the settings that the default shaders come with here. Again, this just for information, we won’t be playing with this value, in fact, we could probably remove it.
CGPROGRAM
This is where our shader code starts.
#pragama
The pragma is telling the unity compiler what shaders we are using. In this pre generated shader, this is a surface shader, it is then followed by the function name for the shader, in this case surf and if a surface shader the followed by the type of lighting algorithm to use, in this case Lambert. There are a few lighting algorithms, in hlsl I have written a few, Unity comes withe Lambert and BlinnPhong. What I do like about surface shaders is we can write our own lighting algorithms too, and we will come to that later.
Shader Variable Declarations
We have a parameter defined at the top, but we then need to create a variable for in inside the CGPROGRAM section, and parameters set that we want to use in the shader need to be duplicated here. We can also declare variables here that are not passed as parameters if we want to too. In this shader we have just the one
sampler2D _MainTex;
Shader Structures
This is where we define the structures to be used that describe the vertex data we are passing in and the data we are passing to other shaders. In this surface shader we are just getting data for the pixels inside each triangle, like a pixel shader, so Unity will have already ran a vertex shader for us and then it will pass the data we require as laid out in the structures defined here.
Defined here is a structure called Input
		struct Input
		{
			float2 uv_MainTex;
		};
It is going to pass us the texture coord for the given pixel so we can then use that to get a texel (not pixel) off the texture passed in for the given coordinate.
How on earth does it do that and what is a texel!?!?!?!
OK, this bit is a bit funky :) Remember we set up those texCoords in our earlier runtime quad code
        // Set up text coords
        texCoords.Add(new Vector2(0, 1));
        texCoords.Add(new Vector2(0, 0));
        texCoords.Add(new Vector2(1, 0));
        texCoords.Add(new Vector2(1, 1));
We said that the top left corner was 0,0 and the top right was 1,0, well when this information is given to the surface or pixel shader it is interpolated, that is to say, when we get given the pixel(s) between the top left corner and top right corner they will be in the range of 0,0 and 1,0. So if the pixel being sent to the surface shader is slap in the middle and at the very top of the mesh, it would have the uv_MainTex value od .5,0. If it was the pixel in the very centre of our rendered quad then uv_MainTex value would be .5,.5. So by using this mapping we can get the right texel from the texture passed in.
Texel = TEXt ELement, the GPU can’t work on a pixel to pixel mapping, the texture you pass could be 32x32 pixels and the area your mesh covers could be, well, the whole screen or 16x16, so the GPU needs to use the texture coordinates to pull out the colour at that point. To do that on a pixel by pixel basis, just would not work…
Surf
And now, the part you have all been waiting for, the actual shader it’s self…
		void surf (Input IN, inout SurfaceOutput o)
		{
			half4 c = tex2D (_MainTex, IN.uv_MainTex);
			o.Albedo = c.rgb;
			o.Alpha = c.a;
		}
This is being call for each and every pixel that your mesh is showing to the camera. The function is being passed the Input structure, as I have explained above this will have the interpolated data for the given pixel with regards to the mesh. There is also an inout parameter, SurfaceOutput o. This structure will be populated by this function then handed onto the rest of the Unity surface pipeline to have the lighting applied to it.
The SurfaceOutput structure is pre defined in Unity and looks like this
struct SurfaceOutput {
    half3 Albedo;
    half3 Normal;
    half3 Emission;
    half Specular;
    half Gloss;
    half Alpha;
};
All that is getting populated here is the Albedo and the Alpha. The Albedo is the colour of the surface to be returned for this particular pixel and the Alpha is the corresponding alpha.
ENDCG
Denotes the end of your shader code
Fallback
This is the default shader to use should this shader be unable to run on the hardware.
Play Time
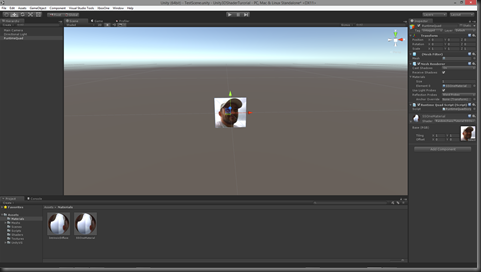
So, that was a lot of waffle, lets look at altering this shader so we can see how some of it works. First we need to use our new material on our rendered object, now you can use our runtimequad or add a new model to the scene and set it’s material to our new SSOneMaterial.
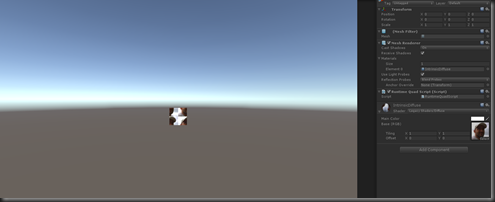
Once you have assigned the new material, give it a texture.
Run this and we can see (or you should) that it runs as it did before with the other shader.
Lets add a new parameter to the shader. In the Properties section add a new property _Tint like this
	Properties
	{
		_MainTex ("Base (RGB)", 2D) = "white" {}
		_Tint ("Color Tint", Color) = (1,1,1,1)
	}
We need to also set up a variable for this, so under sampler2D _MainTex; add a float4 (a colour is a float4)
		sampler2D _MainTex;
		float4 _Tint;
We can now use this value to tint the image that we out put like this
		void surf (Input IN, inout SurfaceOutput o)
		{
			half4 c = tex2D (_MainTex, IN.uv_MainTex);
			o.Albedo = c.rgb * _Tint;
			o.Alpha = c.a;
		}
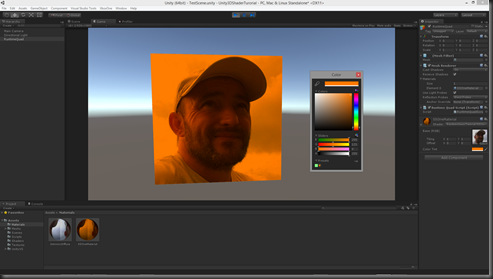
Now, go back to Unity, run the scene, select your object, pick the Tint colour picker and you will see the image get tinted at run time, this can be done in the scene screen when not running too.
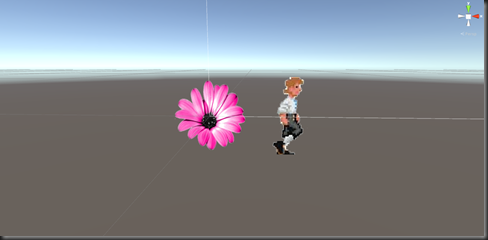
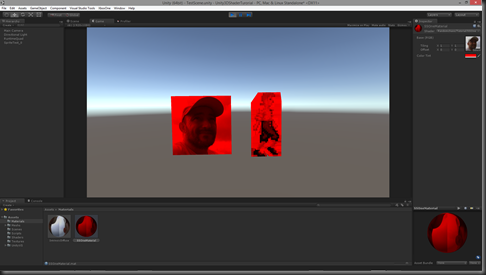
Oh, and just to show you can use these 3D shaders with 2D graphics, here is an image of the sahder being used on both a 3D quad and a sprite at the same time.
Naturally, our shader at the moment is not taking into account the alpha for the sprite, but we can sort that out later, for now, just be clear, what ever we render in 3D with shaders we can do in 2D as well, they are the same thing…
As ever comments and critique are more than welcome. The next post we will look at a few more tricks we can do in the surface shader and if I have time take a look at writing out own lighting model for our shader.
Friday 13 February 2015
Coming from Shaders in XNA to Shaders in Unity3D
This is the first post in an intended series of tutorials covering shader in Unity3D. Now, I am no expert in this area, this is just my experience of working with shaders in Unity3D. I came to Unity3D shaders pre armed I guess, with knowledge gained from writing DX9 shaders in XNA. I have written a lengthy set of tutorials for that as well as creating my own deferred lighting engine in XNA with a post processing pipeline as well as hardware instanced mesh’s and particle systems, all with accompanying shaders, so as far as the GPU goes I do have some experience and I think a good understanding of HLSL and the graphics pipeline.
So what has got me wanting to write this post, especially as there are loads of tutorials out there on Unity3D shaders as well as the excellent Unity3D Documentation? Well, I remember starting out with shaders in XNA, and, well it’s tough to get the concepts and ideas under your belt at first and from what I have seen (I may not have looked very hard) most of them assume existing knowledge. Also, for a lot of developers all these sources are very 3D driven, and a lot of devs don’t seem to then see that these shaders can also be used in their 2D projects.
In the past I have heard people say that 3D is much harder than 2D, but what I don’t think a lot of people realize is when you were working in SpriteBatch (XNA) and now Sprites (Unity3D) you are still working in 3D, it’s just that everything is a quad and always facing the camera.
So I am going to start from the very, very beginning. The first thing we will do will be to create a mesh ourselves in code so we can actually understand what gets passed to the shader, we may not even get to look at a shader in this post :S
A friend of mine, Jay from Drop Dead Interactive, sent me a great youtube link to a series of Unity Shader tutorials, you might want to check this out to. I liked it, worth a look if you have time.
The Vertex
Please forgive me if I am teaching you how to suck eggs (showing you something you already know), but if people don’t understand the very root of the pipeline, then it’s easy to get confused.So what is the Vertex (plural, Vertices)?
OK, the Vertex is a structure that holds information for a given point on a mesh. So at the very least this would be a Vector3 for the point position on the mesh, not in the world, but on the mesh.For the GPU to draw anything on the screen it needs at least 3 vertices, and to draw a quad (a flat square, billboard or sprite), at least 4 vertices (you could use 6 to draw 3 triangles, with indexing the GPU sort of does this anyway). All meshs are made up of triangles, so you can imagine the more curved your mesh is, the more triangles are needed.
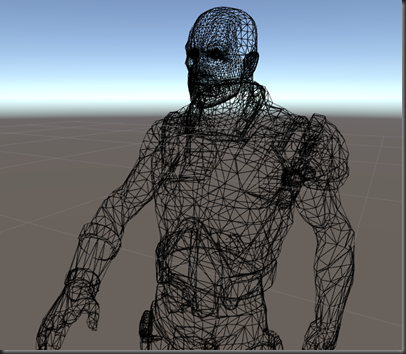
Each one of the triangles in the image above is built from 3 vertices.
The Vertex also has other information with it, it also has the direction this point is facing, this is also known as the “Normal”, it will also have texture coordinates (textcoord), that describe how a texture would be applied to it. For now, we will focus on these there elements, position, normal and texcoord. The texcoord are also referred to as UV, I am sure you have heard artists talk about UV mapping in modeling tools and this is the process of setting up the vertices so that the right bits of the textures are mapped to the right parts of the mesh. I am terrible at UV mapping, it’s a real skill and I just don’t have the patients…
Unity is Left Handed – XNA was Right Handed
So, why does this matter? Well, you can get your self in a bit of a pickle if you are not aware of it, and I get in a pickle all the time as I am so use to working right handed. But what does it mean for a graphics system to be left or right handed? Well, it’s about how the coordinate system works, I could describe it here, but found a great link explaining handedness here.RuntimeQuadScript.cs
To help me show you the sort of data that gets sent to the shader we are going to create a script that will generate a Quad for us at run time. Now, for those of you that don’t like working in 3D, see this quad as a sprite, not as 3D geometry, the sprites and GUI.Image elements you have been working with, even the 3D text are all quads, so think of this as a sprite, ill even show you how we can use our shaders on sprites and even text in our games.What do we need then, we need a list of position data, Vector3, 4 in total, an index list used to draw the positions in the correct order (winding order) , 6 in total, a list of Vector2’s for texture coordinates, again 4 in total as well as a list of Vector3’s for the normals, again, 4 in total. We also need a Mesh to put it all in and we can apply a material and so in turn a shader to.
using UnityEngine;
using System.Collections;
using System.Collections.Generic;
using System.Linq;

[RequireComponent(typeof(MeshFilter))]
[RequireComponent(typeof(MeshRenderer))]
[ExecuteInEditMode]
public class RuntimeQuadScript : MonoBehaviour
{
    /// <summary>
    /// List to store all our vertex positions
    /// </summary>
    List<Vector3> positions = new List<Vector3>();

    /// <summary>
    /// List to store the order we want the positions rendered in.
    /// </summary>
    List<int> index = new List<int>();

    /// <summary>
    /// List to hold the text coorinates we want for the mesh.
    /// </summary>
    List<Vector2> texCoords = new List<Vector2>();

    /// <summary>
    /// List to hold the normals we wish to create.
    /// </summary>
    List<Vector3> normals = new List<Vector3>();

    /// <summary>
    /// The mesh that our variables will create.
    /// </summary>
    Mesh thisMesh;
Now we can use these elements create our quad. First thing we will do is initialize our mesh and load up the vertex positions we need.
 // Use this for initialization
    void Start()
    {
        // Initialize the mesh object
        thisMesh = new Mesh();

        // Set up position data.
        positions.Add(new Vector3(-.5f, .5f, 0));           // Top left corner
        positions.Add(new Vector3(-.5f, -.5f, 0));          // Bottom left corner
        positions.Add(new Vector3(.5f, -.5f, 0));           // Bottom right corner
        positions.Add(new Vector3(.5f, .5f, 0));            // Top right corner
We can then set the draw order of these positions with a list of indicies, so each value in this next list corresponds to a Vector3 in out position list, so 0 would be the first Vector3 and 3 would be the last.
        // Set up the draw index
        index.Add(0);           // Draw from top left corner
        index.Add(3);           // to bottom left
        index.Add(2);           // then to bottom right

        // Next triangle
        index.Add(2);           // Draw from bottom right
        index.Add(1);           // to top right
        index.Add(0);           // then to top left
We can then give these values to the mesh and set it in the filter like this, remember we are rendering the mesh to face our camera at 0,0,-10.
        // Now give our mesh this data
        thisMesh.vertices = positions.ToArray();
        thisMesh.triangles = index.ToArray();

        // Now put this in the mesh filter so the renderer apply a material to it.
        GetComponent<MeshFilter>().sharedMesh = thisMesh;
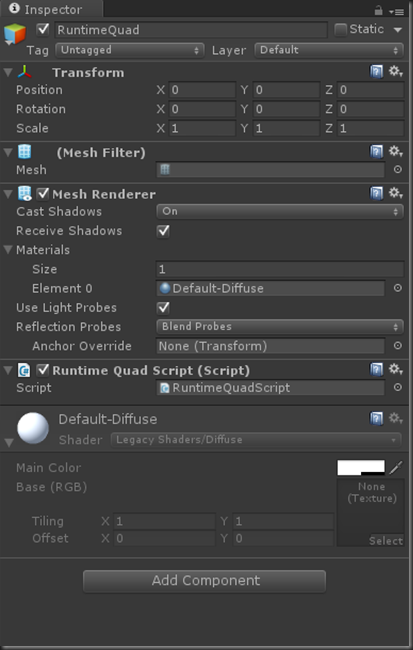
We can now create an empty game object, rename it RuntimeQuad and add our script to it like this
The quad
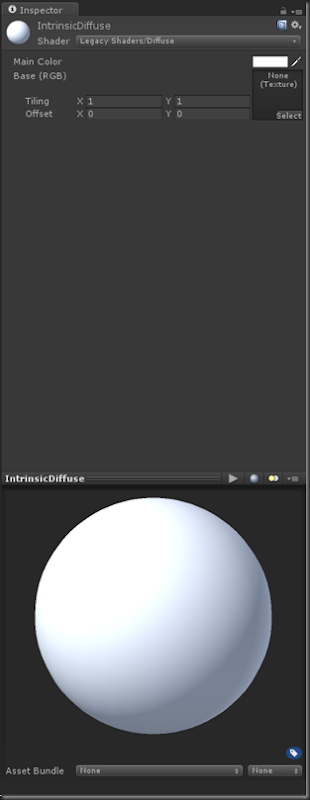
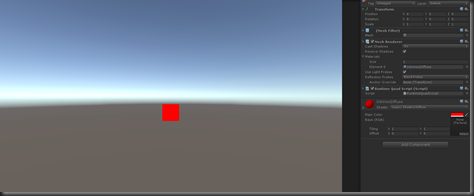
As we had the required attributes at the top of our class, the MeshFilter and MeshRenderer have been added automatically for us. You will also see that I have set the MeshRenderer to use the Default-Diffuse material, before you do that you will see your quad rendered as a magenta square like this
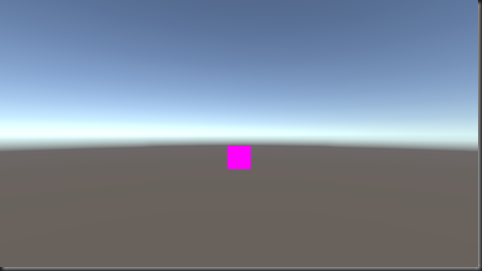
Once you have set the material it will look like this
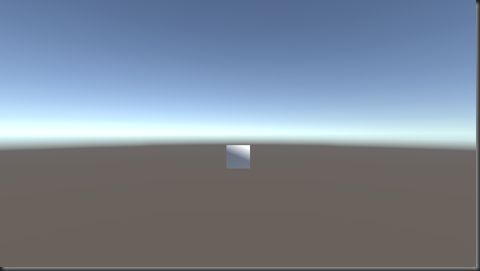
You can see that it’s being shaded in an odd way with that shadow on the bottom, this is because we have not set up the normals, so the default shader does not know which direction the mesh is facing, we can set the normals in a couple of ways, first we will do it by hand
        // Create our own normals
        normals.Add(Vector3.back);
        normals.Add(Vector3.back);
        normals.Add(Vector3.back);
        normals.Add(Vector3.back);

        // Now give our mesh this data
        thisMesh.vertices = positions.ToArray();
        thisMesh.triangles = index.ToArray();
        thisMesh.normals = normals.ToArray();
So I am setting the normals to Vector3.back, so they will be 0,0,-1 , so pointing in the direction of the camera, the quad now renders like this
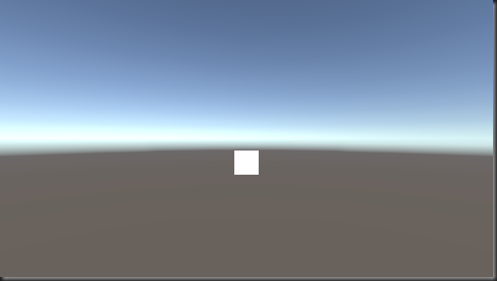
Unity3D’s Mesh has a lovely intrinsic method called RecalculateNormals, so, we can do away with the normals list, but I had it in here just to illustrate how they look and what they are referring to.
We can do that like this
        // Now give our mesh this data
        thisMesh.vertices = positions.ToArray();
        thisMesh.triangles = index.ToArray();
        //thisMesh.normals = normals.ToArray();

        // Thankfully, Unity provides a method to calculate the normals of the mesh
        thisMesh.RecalculateNormals();

        // Now put this in the mesh filter so the renderer apply a material to it.
        GetComponent<MeshFilter>().sharedMesh = thisMesh;
using UnityEngine;
using System.Collections;
using System.Collections.Generic;
using System.Linq;

[RequireComponent(typeof(MeshFilter))]
[RequireComponent(typeof(MeshRenderer))]
[ExecuteInEditMode]
public class RuntimeQuadScript : MonoBehaviour
{
    /// <summary>
    /// List to store all our vertex positions
    /// </summary>
    List<Vector3> positions = new List<Vector3>();

    /// <summary>
    /// List to store the order we want the positions rendered in.
    /// </summary>
    List<int> index = new List<int>();

    /// <summary>
    /// List to hold the text coorinates we want for the mesh.
    /// </summary>
    List<Vector2> texCoords = new List<Vector2>();

    /// <summary>
    /// List to hold the normals we wish to create.
    /// </summary>
    List<Vector3> normals = new List<Vector3>();

    /// <summary>
    /// The mesh that our variables will create.
    /// </summary>
    Mesh thisMesh;

 // Use this for initialization
    void Start()
    {
        // Initialize the mesh object
        thisMesh = new Mesh();

        // Set up position data.
        positions.Add(new Vector3(-.5f, .5f, 0));           // Top left corner
        positions.Add(new Vector3(-.5f, -.5f, 0));          // Bottom left corner
        positions.Add(new Vector3(.5f, -.5f, 0));           // Bottom right corner
        positions.Add(new Vector3(.5f, .5f, 0));            // Top right corner

        // Set up the draw index
        index.Add(0);           // Draw from top left corner
        index.Add(3);           // to bottom left
        index.Add(2);           // then to bottom right

        // Next triangle
        index.Add(2);           // Draw from bottom right
        index.Add(1);           // to top right
        index.Add(0);           // then to top left

        // Set up text coords
        texCoords.Add(new Vector2(0, 1));
        texCoords.Add(new Vector2(0, 0));
        texCoords.Add(new Vector2(1, 0));
        texCoords.Add(new Vector2(1, 1));

        // Create our own normals
        normals.Add(Vector3.back);
        normals.Add(Vector3.back);
        normals.Add(Vector3.back);
        normals.Add(Vector3.back);

        // Now give our mesh this data
        thisMesh.vertices = positions.ToArray();
        thisMesh.triangles = index.ToArray();
        thisMesh.uv = texCoords.ToArray();
        //thisMesh.normals = normals.ToArray();

        // Thankfully, Unity provides a method to calculate the normals of the mesh
        thisMesh.RecalculateNormals();

        // Now put this in the mesh filter so the renderer apply a material to it.
        GetComponent<MeshFilter>().sharedMesh = thisMesh;
    }

 // Update is called once per frame
 void Update ()
    {

 }
}
And it now renders like this
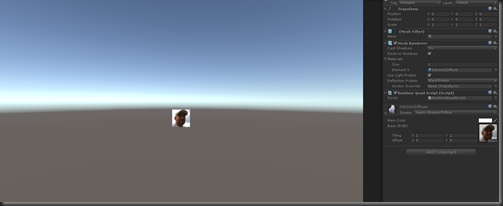
I know, I know, you are wondering when we are going to start looking at actually writing a shader, and we will, but first, PLEASE spend some time to understand the values used to create the mesh we just created. Have a play around with the values, set one of the textcoords to .5f,.5f or one of the vertex positions to 1,2,0 or go back to manual normals and set one to Vector3.forward, so you have a clear idea of what all these elements are doing, because if you don’t get these fundamentals clear in your mind, shaders are going to cause you nothing but pain.
As ever if you spot anything in my post(s) that is incorrect or misleading, then please let me know, just post a comment bellow and Ill sort it out, same with any questions you might have, feel free to fire off a comment below.
In the next post we are going to look at creating our first shader, honest :P

